Monday, September 10, 2012

HOOKING ALONG . . . A New CAL Has Begun

It's nothing official, just an informal CAL - Crochet A Long - with a few friends.  Want to join in?  Jules is writing up some directions. Katrin wrote a great post about this blanket - that's how I learned about it. Sounded good to me and I told EllyD and LuAnn about it... now we are all crocheting up a storm!

Mixed Stripey CAL
 What else is a gal to do with huge Space Bags FULL of yarn??
Part of my Yarn Stash

Missy - if there is a box around she will find it!
Missy 'observing' from her new-found box

I've been clearing out and de-stashing in order to re-organize my sewing space. This box was supposed to hold a lot of fabric and several books and magazines. It was headed to my Guild for our donation table. Guess I better find another box!

Until next time. . . what are you doing today???

Linking to Connie at Freemotion by the River.

Quilty Hugs,

Sunday, September 9, 2012

BOATING ON THE LAKE!

Friday evening was extra special because my youngest DD took me on a tour of the lake they live next to... the 2 1/2 hour tour was all by water; in their new BOAT! It was so wonderful. We saw many different kinds of birds, some ducks and a few other boaters. Laura piloted this boat like an ol' salt! Gosh she's good at it. Backed it straight out of the slip and did some fancy maneuvers. I felt so safe in her care.  While on the boat I was able to get a few good pictures, but the first two are the views from her backyard:

View from their backyard [looking left toward Lake]
Backyard view
Exiting the slip. Laura is good at this!


They have several pairs of swans that live on their Lake year 'round

Rippin back to docks b4 sun goes down - new running-lights aren't hooked up yet


Their boat on the right. We docked just as the sky lit up all orange & pink. Pretty!
Sky turned brilliant just after we docked and tied up! Nature provided a spectacular show!!! Again, this is a backyard view. Nice.
Until next time. . . let's go stitch something!
Quilty Hugs,


Saturday, September 8, 2012

RAINBOW SCRAPPY SAT - Orange!

This month's color for the RSC12 is: ORANGE! What a fun color. I want to incorporate more of this great color into my quilts.
Halloween themed block for a friend's Oct 31st birthday!
Hiding in my on-going stash blocks, is the little gem above. So near completion.  I better hurry up and finish it because it is for a friend's birthday next month!  A small pieced border using up my orange bits would bring it up to just the right size to cover a pillow form.

So that's what I'll be doing today... how about you? What are you up to?  Until next time. . .

Linking up to: SoScrappy Linky Party. Go see what others are up to with their oranges!

Quilty Hugs,

Friday, September 7, 2012

BEASTY'S BINDING - TaDah, another OPAM finish!

Today the Quilt-As-You-Go Crazy9Patch finally got her [his?] binding completed.  I'm not sure how or why, but this quilt acquired the nickname of  "Beasty."  Poor thing.  He/she really needs a better name - do you have any ideas?
QAYG Crazy9Patch: the back
I decided to do all of the binding by machine. First I tried a straight stitch of 2.75 length -- looked nice on the front, not so much on the back. Insert a little Frog-Stitching here...lol

Then I tried a very small zig-zag with a 1.5 width & a 2.0 length. This stitching went on the very edge of the fold -- mostly. lol. It's acceptable on the back.  Each corner will have a tack stitch or two to maintain the miter. This is not a show quilt, just something my family lovingly calls a "drag rag." It will probably take many trips to the washing machine during its lifetime, so the zigzag ought to help the binding stay where I put it. [Picture below, right.]

QAYG Crazy9Patch - the front
I quilted and assembled it using a Quilt As You Go method. This was an opportunity to vary the backing fabrics from block to block. And, it used up a bunch of small and odd bits of stash. [please see pic above, top]. I think I like the back better than the front.

Front Corner binding closeup

Well, that's what I've been up to the last few days. Finishing this quilt that measures 60 X 76. Not too big, and not too small... "just right," as Goldilocks would say.  What are you up to today/this weekend??

Until next time. . . I plan to go cut up some fabric. How about you?

Quilty Hugs,

MENU FUN:
My Plant-Based nutrition plan has been modified to include additional protein such as eggwhites, occasional small servings of certain fish and chicken breast. Today's salad has: Romaine lettuce, diced tomatoe, red & yellow bell peppers, then a sprinkling of Nutrional Yeast, 2 T of salsa and 1/2C of EggBeaters cooked like an omlet, rolled up and served on top. It was yummy. Desert was a small fresh nectarine.
Menu Fun: Fresh Salad + EggWhite Omlet

Wednesday, September 5, 2012

QAYG - Step By Step: 12 Photos

As promised, here is a step-by-step series of 12 photos showing the method I used to connect my quilted pieces. The first steps of the actual quilting process can't be shown b/c I began this project so many years ago. lol. This post is about connecting quilted pieces, not the process of FMQing.

STEP 1: Quilt your blocks &/or sections as desired. If machine quilting, you can quilt all the way to the EDGE with this method.

Disclaimer: A couple of pics are a tad blurry... sorry. I didn't get a manicure before taking these pics... bad planning. lol. Most of the directions are explained in TEXT on the pics themselves.  Picture of finished quilt to follow in a day or so... it is getting its binding on! Here we go. . .

PUTTING IT TOGETHER: To connect quilted blocks -sections -borders, etc, it helps to TRUE-UP the edges first. Now CUT your fabric SASHING Strips. Mine are 1.125" and 1.75" b/c I am using 1/4" seam allowances. The 'extra' 1/8" inch in the narrow strip allows for the loft in the batting - adjust this if you use a thick batt.


Below is a slightly better pic showing the sashing edges lined up to be sewn:
 

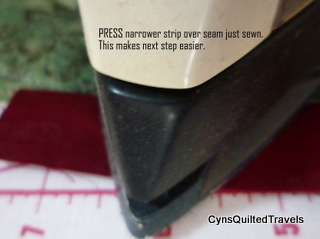
Sew with a 1/4" s.a. & use a WALKING FOOT - this really helps!


Lay the next piece to be connected Right Side UP next to the section that has the sashings sewn to it. This will help you NOT sew something upside down. Ask me how I know this!

Align raw edges and sew with a 1/4" s.a..  The layers above are [in order]: Border RS down, 1 1/8" sashing strip RS down - sew this seam... again, use a WALKING FOOT and let the left edge of your WFoot ride on TOP of the previous seam - it really helps to sew it this way.


Seam allowances are meeting, so it looks good so far. If they overlap, you will need to frog-stitch & use smaller s.a..  If there is a very SMALL gap, a tiny sliver of batting scrap can be inserted.

The pic above is showing the folded edge of the sashing strip on the Right Side of quilt. I did it this way in case I decided to machine down the folded edge. You may use fabrics for your sashings that complement or offer new design elements to your quilt... it's up to you. If you use matching fabrics as I'm doing on the outside border, then the sashing strip can almost "disappear". Quilter's choice.

That's it. This is a very straight forward method. Nothing fancy. Don't need special tools. Do what you need to do in order to achieve a perfect 1/4" seam allowance... this is important.
 
Thank you for being so patient and waiting for me to write this up. If you find an error, or if a step is not clear, please email me - thank you.
 
I'm going to finally sew that binding on this thang. . . what are YOU going to do today?  Until next time. . . I'm going to sew!

Quilty Hugs,

Tuesday, September 4, 2012

2 WINNERs!!

First of all, THANK YOU and WELCOME to all my new Followers! This BlogHop was a lot of fun and we all had the opportunity to meet and make new online friends.  But, without further ado. . .Drum roll. . . we have TWO winners.  [comments choosen by Random.org]
First Prize to: SharonB
The first winner will receive the Batik Fabrics & Stork Scissors, and that lucky person is:  *SHARON B*

Sharon B said...
Hops are sew much fun - getting to met new blogger friends!
I am now following your blog.

Wednesday, August 29, 2012 10:41:00 AM PDT
Additional Prize to: Terry
The second winner [I added an additional prize package] will receive the JellyRoll and Scissors on a Lanyard, and that lucky person is: Terry

Terry@ a quilting blog said...
I'm already one of your happy followers Cyn!!! Thanks for the sweet giveaway!
Monday, August 27, 2012 9:41:00 AM PDT

Congratulations, SharonB and Terry!!  Emails are on their way to you both. You have 48 hours [from the time of this post] to respond with your mailing info or another comment will be choosen.  Congrats again to the winners and I hope everyone had a bunch of fun. A special THANK YOU to Michele of the QuiltingGallery for hosting our BlogHop.

Today I hope to get the binding attached to a UFO I've been working on... what are YOU going to do today?  Until next time. . . 

Linking to: Freemotion By the River - Connie's Linky Party... come on over!

Quilty Hugs,

Monday, September 3, 2012

SAND CASTLE ART. . . Competition in San Diego

Quick note: BLOG-HOP on my blog
 CLOSED at NOON today.
Thank you to everyone who participated and left comments.
WINNERs will be announced TOMORROW, Tuesday!
===============================

Last Friday was the "U.S. Sand Sculpting Challenge and 3D Art Expo". It was held on one of the piers in San Diego Harbor. It was so interesting to see it while in the set-up phase. Artists from all over the world assembled for this competition.  I have seen beautiful sand art before, but never in-process. It was so interesting to see it from the beginning and to speak with some of the artists. A wonderful day... sit back, there are quite a few pictures to enjoy.
Artist's name was not credited for this amazing piece of sculpture. Sad.
1) Build a form, 2) Fill with sand & pound it down tight!
Another form taking shape
Karen Fralich working a shovel for initial shaping.
 
Karen & Cyn - Karen was so fun to talk to. She is a pro and this is her livelyhood. She's won many awards!
This guy was so fun: said I could take a pic, but I had to bring him a BEER... a COLD one! lol
Look close on the left [near his face], he is sculpting a 'loo'. It's a replica of his DD's Doll House.
Even Channel 9 News was there taking some "B-Roll" [I think that's the term]
Look at the size of his uplink attenna!
An action shot: this shows how/what 'pounding sand' is... and what hard work it is!
Watch those feet with that Iron Pounder!
BIG play space for the kids and all sorts of tools for them to try out... live band in the background.
All pictures taken with permission of participants.

Hope you enjoyed the Sand Art.  Until next time. . . let's go stitch something. For me it will be putting a binding on the QAYG "Beasty" - what will it be for you?

Quilty Hugs,